If you’re venturing into film photography, you might have come across the terms pushing or pulling film. But what exactly do they mean?
There’s a lot of information out there on the subject. Much of it is confusing, and some are just plain incorrect. We’re here to clear up the situation.
This is our ultimate guide to pushing film and pulling film. You’ll be the master of your film rolls by the end of this article.
Understanding ISO and Pushing Film in Film Photography
Before we get to the details of pushing and pulling film, we need to look at ISO. It’s one of the most fundamental aspects of film photography. And ISO is one corner of the exposure triangle.
The ISO refers to the film speed. It’s a label used to identify how sensitive a roll of film is to light. A lower ISO number means the film is less sensitive to light than a roll with a higher ISO number. So, a roll of ISO 200 film is less sensitive than a roll of ISO 800 film.
A roll of film with a high ISO is more sensitive to light, which means they work well in low-light situations. But the sensitivity comes at a cost to image quality. The higher the ISO, the more film grain you’ll see on the image. Lower ISO films produce images with little to no grain.
On a digital camera, you can change the ISO with the click of a button. It takes no time, and you can do it between shots. But it’s not so easy with film photography.
Each roll of film has a fixed ISO that you can’t change. The only way to change the ISO is to change the film cartridge. Once that roll is in your camera, you can’t change the ISO until you’ve finished the entire roll.
This is one of the reasons film has fallen behind digital photography over the last few decades. Film cameras don’t have the same flexibility for settings like ISO. But you’re not entirely powerless when using film. And that’s where pushing and pulling film comes into play.
What Is Pushing and Pulling Film?
Pushing and pulling film is where you treat a roll of film as if it has a higher or lower film speed. Rather than following the procedure of the ISO speed on the film box, you under or overexpose the film.
There are two parts to this process. You have the in-camera part of the procedure, where you shoot the film. Then there’s the pushing and pulling in the development stage. You can push and pull with both color and black and white film.
Pushing Film
Pushing film is where you treat a roll of film as if it has a higher ISO. If the box speed is ISO 200, you set up and shoot as if the ISO is 400 or 800.
We measure ISO in “stops.” If you push a film from 200 to 400 ISO, you’re pushing the film one stop. You’re pushing two stops if you shoot a 200 film at 800 ISO.
Changing the camera settings to push a film is simple. When you load your film, set the ISO one or two stops higher than the speed on the box. This will trick your camera into thinking the ISO is higher than it actually is.
If your film camera is an entirely analog camera with no automated features or exposure assistance, you can use a light meter. Set the ISO you want on the light meter and shoot accordingly.
But if your camera has an internal light meter and automated settings, all you need to do is set ISO one or two steps higher. The camera will think the ISO is whatever you set it to, changing the shutter speed and aperture.
Setting your camera up like this will underexpose the film by giving the film less light when taking the shot. And then you compensate for this by developing the film for a longer period.
Pushing film increases the contrast in your images. It deepens blacks and dark colors, giving you a stronger film grain texture.
Pulling Film
As you might imagine, pulling film is the opposite of pushing film. Rather than pushing the film up a few stops, you’re pulling it down a few stops. If you’re using an 800 ISO film, you shoot the film at 400 or 200 ISO. Then you develop the film for a shorter time.
The camera process is the same for pulling as it is for pushing film. You trick your camera by setting the ISO speed you want rather than the speed listed on the box. And if the camera isn’t automatic, you adjust the shutter speed and aperture as recommended by the light meter.
A pulled film is overexposed rather than underexposed. You’re giving the film more light than the box speed recommends. The reduced development time compensates for the extra light during the exposure.
Pulling film reduces contrast in your image. It can bring out details in shadows or poorly lit areas of your shot. It will mute colors and can reduce the grain of higher ISO film stocks.
Pulling film is far more common with black and white film. You can pull color negative film, but we don’t recommend it. Color film doesn’t react well to underexposure. Your images will be dark, and the colors won’t be vibrant.
Developing Pushed & Pulled Film
Under or overexposing your film in the camera is only half the battle. Whether you’re pushing or pulling film, you need to compensate for the change in ISO during the development process.
If you take your rolls to a film lab for development, you’ll need to let them know the films have been pushed or pulled. It’s best to explain this to the shop assistant. But if you send your film in the mail, leave a note and mark your film.
To mark the films, you’ll need a permanent marker. Indicate how many stops you’ve pushed or pulled by writing directly on the film canister. A note of “+1” shows you’ve pushed the film one stop. Writing “-2” indicates you’ve pulled the film two stops.
Here’s some guidance for developing pulled or pushed film if you’re a DIY photographer.
Push Developing
When you push film, you’re underexposing it. So, if you develop the roll as usual, all your images will be underexposed. You need to compensate for the extra light by increasing the time in the processing fluid.
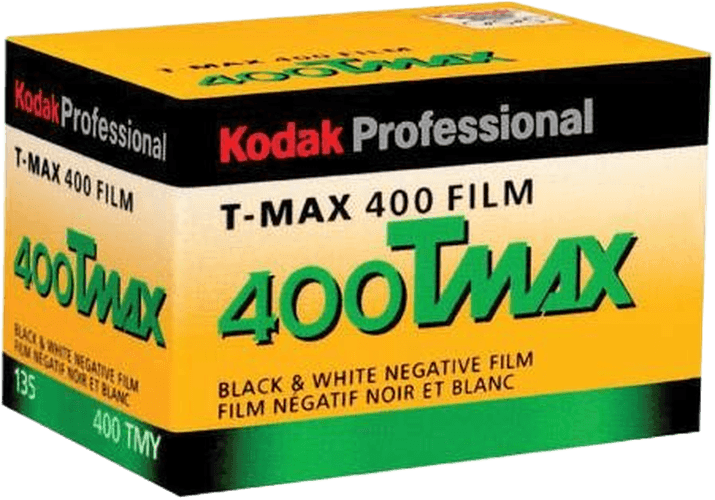
We’ll use Kodak T-Max 400 ISO photographic film as an example, developing in a solution ratio of 1+4.
The film will need 6.75 minutes in the solution if you develop it according to the box speed. If you push it one stop to 800 ISO, it will require 8 mins. If you’re pushing two stops to 1600, it will need 8.5 minutes in the solution.
Pull Developing
When you’re pulling film, you’re reducing the amount of developing time. You’re compensating for the in-camera overexposure of the film.
For this example, we’ll use Kodak T-Max 3200. When exposed at the native ISO, it would need to be developed for 9.5 minutes.
When we pull the film down one stop to 1600 ISO, we need to reduce the time to 7 minutes. If we go down to 800 ISO, it only needs 6 minutes in the solution.
Reasons for Pushing and Pulling Film
The main reason to push or pull film is to gain more creative control when using analog equipment.
Pushing film increases contrast giving you more depth when working in flat light situations. And you achieve a strong grain texture with low ISO film stocks.
Pulling film decreases contrast. It can be helpful if you’re working in an environment with high light contrasts. It pulls details from bright or dark areas. And pulling a high ISO stock reduces grain.
You can also pull film when using expired film. The film emulsion loses its strength after the sell-by-date. And overexposing it when shooting is a way of bringing the life back into your shots. The general rule is to pull one stop every ten years past the expiry date.
You might also need to pull your film if you’re using an old camera model. For example, I have a Minolta Hi-Matic F, which has automatic exposure settings. When I shoot at the ISO stated on the box, the photos are dark and foggy. Pulling the ISO by one stop clears things up.
When you pull expired film or because the camera is old, you can develop in the usual way. But you might need to push or pull develop if you make an in-camera mistake. If you shoot a film at the wrong ISO setting by mistake, you can rescue it in development.
Conclusion
Pushing and pulling film can be confusing, especially if you’re new to film photography. But it’s a simple process once you get to grips with it. And it’s a great technique that gives you extra options when shooting film.
Film photography can’t rely on the settings options of digital cameras. Techniques like pulling and pushing film take some practice. But that’s part of the magic of analog photography!
To choose the best ISO (and other settings!) for pushing or pulling film, check out our Photography for Beginners course!

