Back button focusing is a bit of a controversial topic between photographers. Many of them try back button focusing once and deem it unusable. But if you persist, you may have just found your new secret weapon.
The below tips will show you how to set it up and integrate its use in your photography.
What is Back Button Focus Autofocus?
Back button focus simply means that I want to use a button on the back of the camera to control autofocusing.
Digital cameras, by default, are set to autofocus by pressing the shutter button. I push the shutter halfway down, and my camera takes a reading of the scene.
One of the things the camera is looking for is where to focus (the other one is exposure). Once my camera decides on where to focus, I press the shutter all the way down to take the photo.
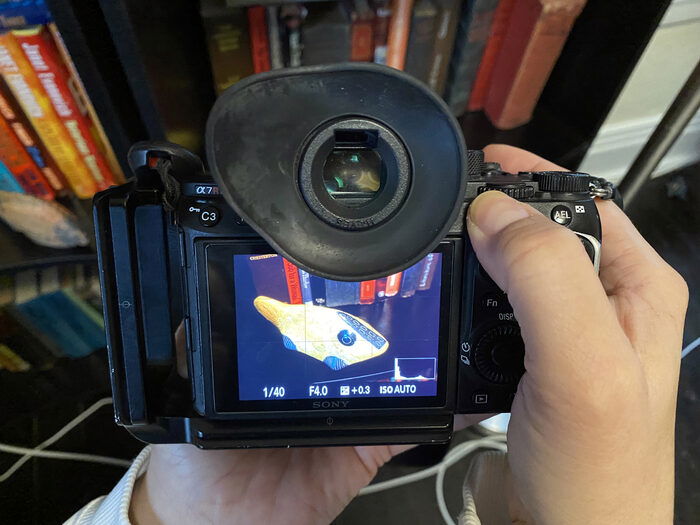
With back button focus, I want to separate the button that takes the photo from the button that focuses. When I press the shutter halfway down, it only meters and takes the photo.
Why Use Back Button Autofocus?
Let me start with the downside of using the shutter button to find focus.
When I press my shutter halfway down, my camera focus is using whatever focus mode I’ve chosen. If I’m shooting static subjects like architecture, I use AF-S (Single Shot). If my subject is moving, I select AF-C (Continuous).
This is called AI Servo on Canon cameras. My camera also has an AF-A (Automatic) focus mode, where my camera tries to figure out what my subject is doing.
The camera takes a moment to assess the scene and guesses which part I want in focus. As digital cameras improve, so does their ability to guess at what I want in focus. But my camera can’t read my mind. It doesn’t know what I want my main subject to be.
Most importantly, each time I lift my finger off of the shutter, focus resets. It’s as if the camera wipes the slate clean every time I click the shutter. Each time I take a photo, my camera has to do the process of finding focus all over again.
But what if I didn’t have to re-trigger the focusing process each time I pressed the shutter?

In a second, the dragonfly I’m photographing will take off. I can have my camera in AF-C focus mode in anticipation of the movement. This means holding my shutter button halfway down for a long time, waiting to track the movement.
But, in this photo, the dragonfly is relatively stable. It’s going to sit on this reed for a while. Do I need to keep my shutter pressed halfway the whole time?
What if I could lock focus when the dragonfly is stable and switch quickly to AF-C when it begins to move?
Lucky for you, you have the option to do this — let’s see how.
If you want to learn how to shoot stunning macro photos like the one above, you can find some awesome tips in our course Macro Magic.
Focusing Faster with Back-Button Focus
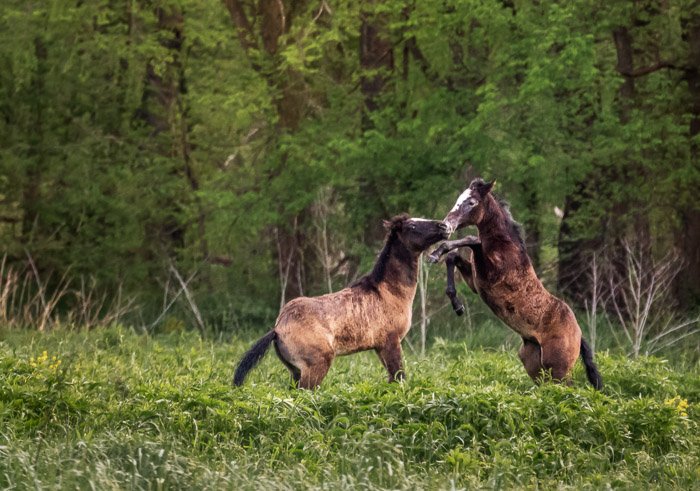
Photographers often use back button focus when photographing quick-moving subjects. This naturally includes wildlife or sports photography.
One of the main reasons for using back button focus is to speed up your image-making.
At first, the process seems slow and clunky. To master back button focus, you’ll need to do some practising and relearn some physical habits. However, after getting used to back button focus, most photographers find it faster than shutter focusing.
Its biggest advantage is the ability to quickly move from continuous autofocus (AF-C) to single point autofocus (AF-S). I’ll show you how to do this below, in the section about setting up back button focus.
Using back button focus, it’s easy to switch from static subjects to moving subjects. I hold down the back button to track my moving subject across the frame. This can be done with the shutter as well.
The difference between them is what happens after I click the shutter.
Locking Focus with Back Button
Photographers use back button focus to lock focus. Press the back button once to focus, then lift off — the focus locks. This way, I can press the shutter as many times as I want with the same focus point.
When I use the shutter button to focus, I have to find focus every time I take a photo. The camera may make a completely different decision on where to focus each time. This is especially the case if I move my subject off-center, or if something else moves into the frame.
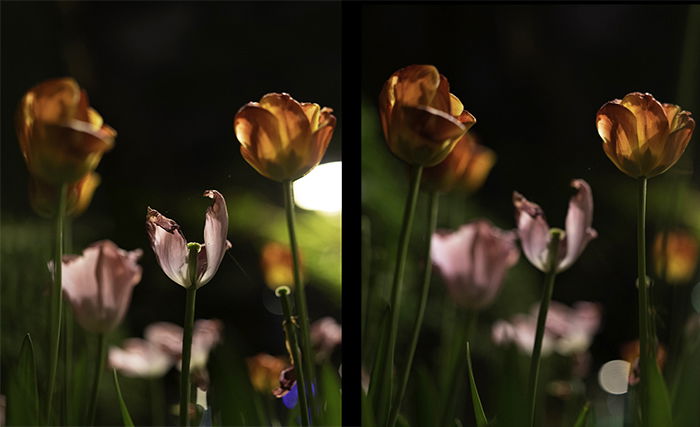
With back button focus, if I lift off the button, it locks focus on the last point. If I want to change focus, I press the back button again. Using the back button means that my camera doesn’t forget the last point of focus.
This means I can find focus on an animal’s eye and take many photos. I’m not afraid that my camera will decide to focus on the background, on another animal in the scene, or on a stick in the brush.
As a result, the back button focus allows me better control of where the camera is focusing.

How to Set up Back Button Autofocus
Camera manufacturers don’t necessarily make it easy to set up back button focus. They use different terms and locate the settings in various places. This can vary not only between camera manufacturers but also from model to model.
There are three steps necessary to set up back button focus (and one of these is optional).
- Isolate Focusing from Shutter Button
- Choose Focusing Button
- Select focusing mode AF-C (optional)
Let’s go through each step in detail.
Step 1: How to Isolate Focusing from the Shutter Button
First, I need to tell my camera not to autofocus using the shutter button. I still want it to find exposure, but not to find focus.
This step might seem a bit scary. We’re so used to using the shutter button to find focus that you might feel disconnected from your camera. Don’t worry, the next step will give you back control.
Most mid-to-high-end cameras allow for buttons, including the shutter, to be customized.
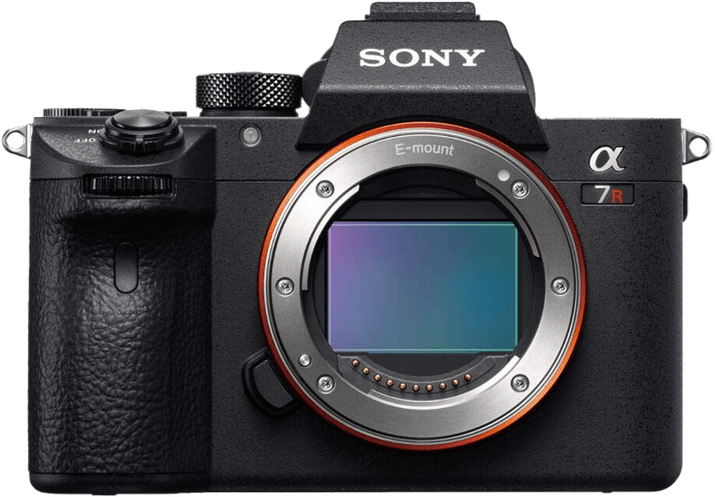
I use a Sony A7R3. In my menu system, I find the AF w/ Shutter and turn it off. This tells my camera not to autofocus with the shutter.
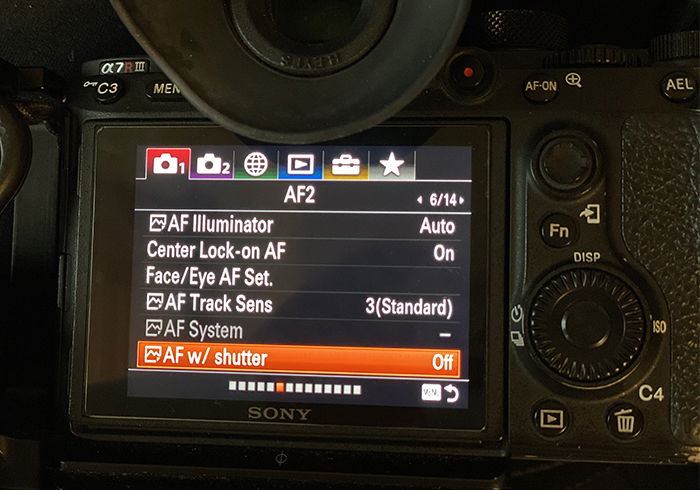
For Canon cameras, you’ll likely find this option under Custom Function controls. Select the shutter button, keep metering start on and turn off AF start.
For most Nikon cameras, this is in the custom settings for autofocus. Scroll to AF activation and select AF-ON only. You won’t have to do the next step. This menu toggles back and forth between shutter button focus and back button focus.
Some cameras treat the shutter differently from the other customizable buttons on your camera. This feature could be located on a different menu screen than the other buttons.
Step 2: How to Choose a Focusing Button
Many mid-to-high-end digital cameras have an AF-ON button on the back of the camera. But it is probably not currently activated on your camera for autofocus. You have to turn on this feature – and that is our next step.
If you don’t have an AF-ON button, don’t panic! Your camera model might have other buttons you can use for back button focus.
There may be a button labelled AEL or one with a star (*). My Sony has a bunch of customizable buttons on the back. I can use any of these buttons to control autofocus.
In your menu, find your custom buttons and assign the AF-ON feature to the AF-ON button (or any button you choose). For my Sony, I selected the Custom Key menu item and scrolled over until I found the AF-ON Button.
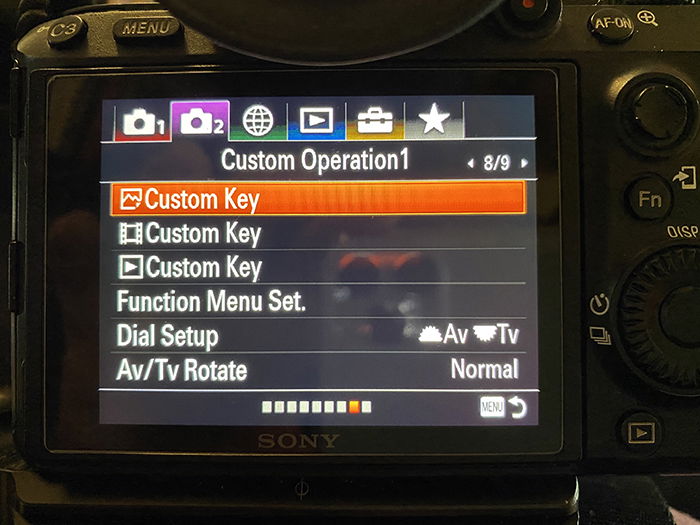
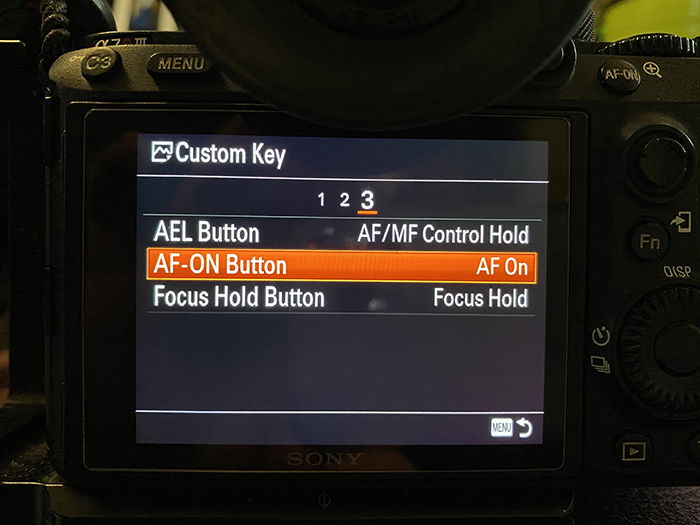
For Canon cameras, you’ll likely find this option under Custom Function controls. Set the AF-ON button to ‘metering and AF start’.
For most Nikon cameras, if you’ve toggled to the AF-ON only option in AF activation, you’re all set.
Step 3: How to Switch from AF-C to AF-S Quickly (optional)
The greatest advantage of back button focus is the ability to quickly move from continuous autofocus (AF-C) to single point autofocus (AF-S). This method will work with any focusing mode. But to get this quick switch, set your camera to AF-C.
When you press the back button to focus, your camera will continuously search for focus. This is what you want to do if your subject is moving in the frame.
With back button focus, if you lift your finger off the button, the focus will lock. This essentially puts your camera in AF-S mode without actually changing the focus mode. The focus will only change again when you press the back button.
Practise Back Button Focus to Improve Your Photography
Back button focus isn’t something you want to try for the first time when you’re on a once-in-a-lifetime trip, or you’re photographing a major life event like a wedding. This is something you practice during a slow season when you have a week or two to play with your camera.
Photograph your kids or pets in the garden. Go to a local pond and photograph the ducks. Try to track moving subjects while pressing the back button. Then try locking focus by lifting your thumb, and take many shots using the same focus point.
It’s not the final images that are important. It’s practising the feel and timing of using another button to control focus that matters.

The biggest mistake I made when I was getting used to back button focus was to forget to press the button to find focus. I was so used to this being a part of my shutter click.
There’s something to be said for immersing yourself in this new technique. I’m not going to tell you that back button focus is something you can master in an afternoon. You’ll need to develop some new physical habits, and this takes a bit of time and effort.
Your practice may seem slow at first. But if you stick with it, back button focus can end up making your photo shooting faster and more accurate.
Conclusion
Back button focusing separates the autofocus from the shutter button. This allows photographers to track moving subjects and quickly lock focus.
Back button focus is not something you can master in an afternoon. You’ll need to develop some new physical habits, and this takes time and effort.
But, with a bit of practice, this way of focusing may become your trump card.
