For all the information about DPI vs PPI, look no further… So what are DPI and PPI?
With so many photography-related acronyms, we don’t blame you if they get confusing. What can we use DPI for? Is PPI or DPI useful for me?
These are terms that aid you with post-processing.
DPI vs PPI: What Does DPI Mean?
DPI, meaning “dots per inch,” refers to a printer’s resolution. These machines create a representation of your image by spraying tiny dots onto paper. The number of DPI denotes the print quality and print size.
DPI means using a color model known as CMYK. Here, cyan, magenta, yellow, and black control the amount of red, green, and blue reflected from the print. This is a subtractive color model, as more added colors remove more reflected light.
These DPI color dots are explicitly printed to allow the eye to see patterns of color. They are of fixed size, and more of them give you more detail and resolution, depending on print size.
When Is DPI Important?
DPI is only important when you decide to print your digital images. Each printer has a different DPI, which limits the resolution. Inkjet printers can handle 300 to 720 DPI, whereas laser printers can handle 2,400 DPI.
DPI dots on printed paper come in different sizes and shapes. More DPI does not always mean a better quality image. A printer can create a print using 300 DPI and look much better than another print from 720 DPI.
What Does PPI Mean?
PPI, or “pixels per inch,” relates to the resolution of an image. At its simplest, this is how many pixels you can find in any square inch of your digital image. This can also relate to how many pixels your digital screen can display.
My computer monitor can show a pixel density range of 2560 x 1080. My digital camera has a range of 5184 x 3456. They differ in size substantially, but they relate to the same thing—resolution or image quality.
If you have heard of the term “pixel count,” this refers to the pixel density you can find along the edges of a digital image.
You might have heard of the term 4K. This term all comes down to how many PPIs there are in your scene. With a 4K still image, you are looking at a size of 3840 x 2160 or 4096 x 2160 pixels. This is twice the resolution of 2160p or four times the size of 1080p (1920 x 1080 pixels).
When you capture a still image with your camera, you get two values—the width and the height. These values are shown in pixels and give you your camera’s resolution.
For example, the Canon EOS 5D Mark IV takes a maximum of 6720 × 4480 pixels. This means the camera has a megapixel size of 30.1 MP.
What Are Pixels?
Pixels are the components of a digital image or computer monitor. If you get close enough, you might be able to see that each consists of little squares. Within these little squares are smaller squares of red, green, and blue light elements.
Red, green, and blue are important. We capture them with an RGB color mode when we edit our images. Print uses a different method, so let’s say that all things electronic use this model.
More pixel density means more of your scene is photographed or shown on your screen. 4K has a higher resolution than HD, but 8K has better image quality.
More pixel density means more RGB elements to record or show a digital image.
When Is PPI Important?
PPI is vital when working with your digital image. When preparing your images for printing vs. DPI, you will use this, which picks it up for the physical picture.
To give an image a higher quality and increase print size, we need to provide it with a larger PPI. The increased pixel density allows more information, such as color and detail, to be stored.
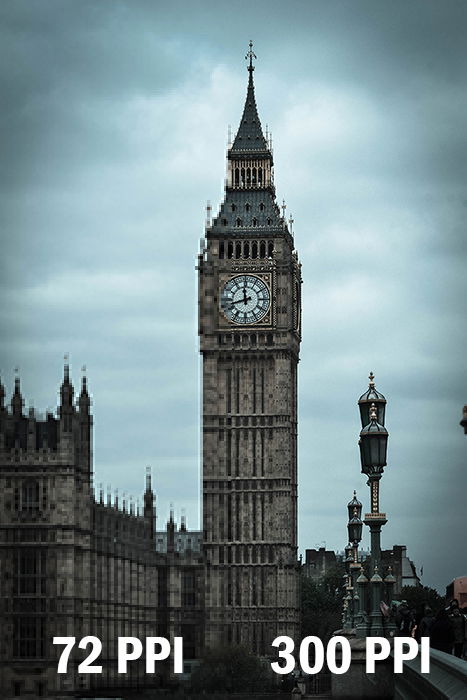
The standard for printing is 300 PPI, vs. images for the internet which can be 72 PPI. This is because a 72 or 300 PPI image and a 6720 PPI image will look the same on your computer monitor.
Changing the size of your image’s PPI will give you a large image print size. If you do not have a large print size, there is no point in increasing them. Otherwise, you eat up the memory of your hard drive.
As well as the print size, the material you want to print on will also denote the PPI used. Canvas prints do not need such a large PPI as details become lost on the fabric material.
An image for clients to hang on their wall will need the standard 300 PPI or higher.
How to Change PPI Value
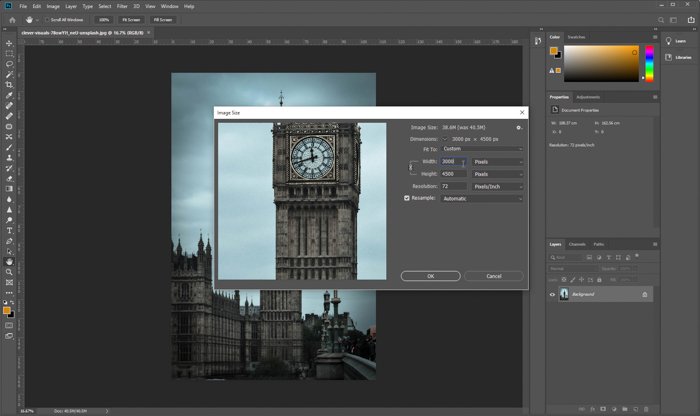
Editing software that works with pixel-based images allows you to change the resolution. Adobe Photoshop is a perfect example, where a quick visit to Image>Image Size will enable you to resample the pixel count.
You can create a New Document and set the PPI there. But, once you import an image, the pixel size will change to fit the import. You’ll notice that the image will vary in size depending on uprating or downgrading the pixel density.
Resampling is also possible in Adobe Lightroom, but only when you come to export the images.
Making an image larger through an increased PPI is something you do not want to do if you can help it. Increasing the PPI size forces programs like Photoshop to create new pixels. It does this through a Content Aware program, reading the pixels surrounding the new one. While accurate, they can be misinterpreted and leave unattractive results behind.
DPI vs PPI
We can see that although both DPI and PPI deal with detail through resolution, just in different areas. DPI refers to the printed image from any given printer, whereas PPI refers to a digital image on your computer or the monitor you are using.
DPI uses a subtractive color model through the CMYK process. PPI uses the RGB model, the additive color model. Having a higher DPI than PPI number can give you a better resolution in your scene. But, the process of doing so could make your image worse in some cases.
Conclusion
Knowledge about the PPI gives you more detail in your images. This is the most important to know about, as chances are, you will want to resize for printing or the web.
DPI will help you get better prints and print sizes, but it is not exactly necessary. When looking at DPI vs. PPI, you have control over the latter, and using a large enough pixel density size will ensure great photographs.
Try out our Effortless Editing course to master all the secrets of professional editing in Lightroom.
