Metadata is the story behind a photograph. It tells us how the image files were created, where, and when. It also describes the content of the photo, identifies the photographer, and shows you how the image was edited in post-processing.
In this article, we will talk about the different types of photo metadata and why this information is important.
Why Is Photo Metadata Important?
Photo metadata is useful for a few reasons.
Metadata is searchable text. You can add titles, descriptions, and keywords to your images. This helps you find photos in your collection. But it also helps other people discover your photos online.
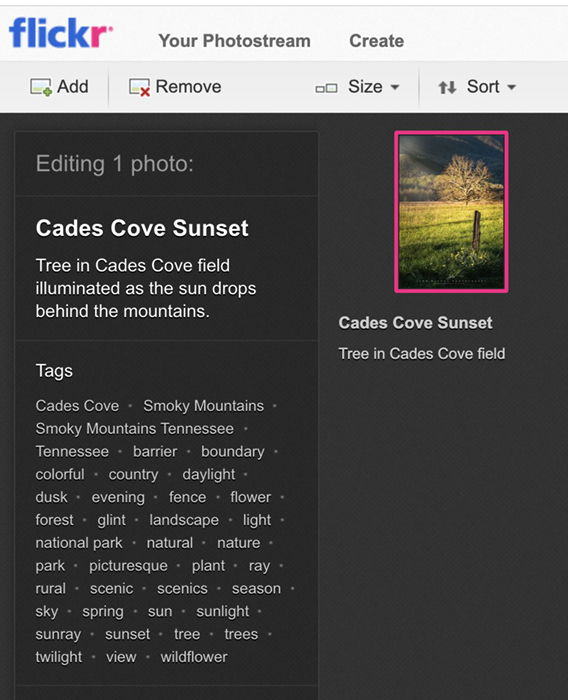
This data often follows your photo when you upload it. For instance, if I upload an image to Flickr, the title, description, and keywords upload, too.
Creator information is also part of photo metadata. You can add copyright and contact information to your photos. Last year, an interior design company wanted to buy a couple of images I posted on Flickr. They found my email in the image file and contacted me. Even if you do not watermark your photos, the metadata records that you are the creator.
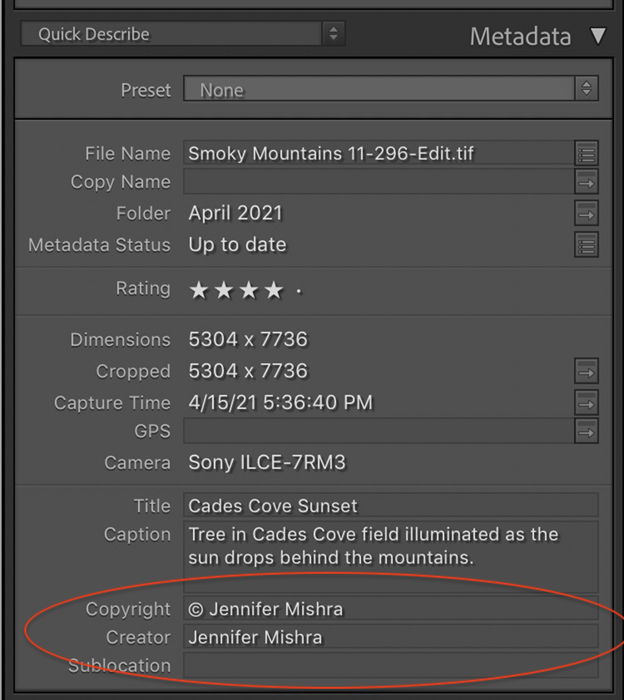
Photo metadata is also a gold mine for learning photography and post-processing. Your camera writes settings like f-stop and shutter speed onto each image. If something does not work in the photo, you can check to see if a setting needs adjusting. For instance, check the metadata for a blurry picture. Maybe your shutter speed was too slow.
Metadata also tracks post-processing changes made in programs like Lightroom. You can see this information for your own photos, but also other photographers’ images. We will talk more about how to access this data in the section on XMP files.
Types of Photo Metadata
There are different types of metadata attached to your images. Each contains particular information. We will cover the three main types usually associated with photography: EXIF, IPTC, and XMP. We will also show you how to find and edit information in the image file.
EXIF
EXIF stands for ‘Exchangeable Image File’. EXIF data is the information embedded in an image by your digital camera. This information includes when you took the photo if your camera is GPS enabled, also where you took the photo. You also get information about the camera and lens you used and the focal length. Your camera also embeds settings like aperture, shutter speed, and ISO.
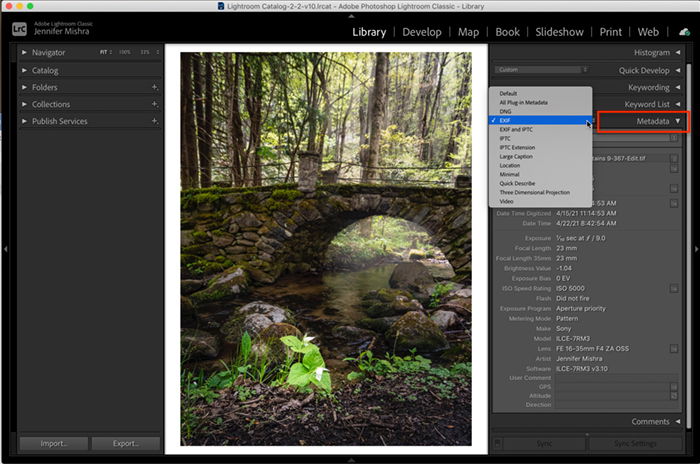
To see photo EXIF data, select an image in Lightroom Classic. Then, open the Metadata tab on the right side of the Library module. On the drop-down menu at the top, select EXIF. In Lightroom CC, click the information icon in the bottom right corner of the workspace.
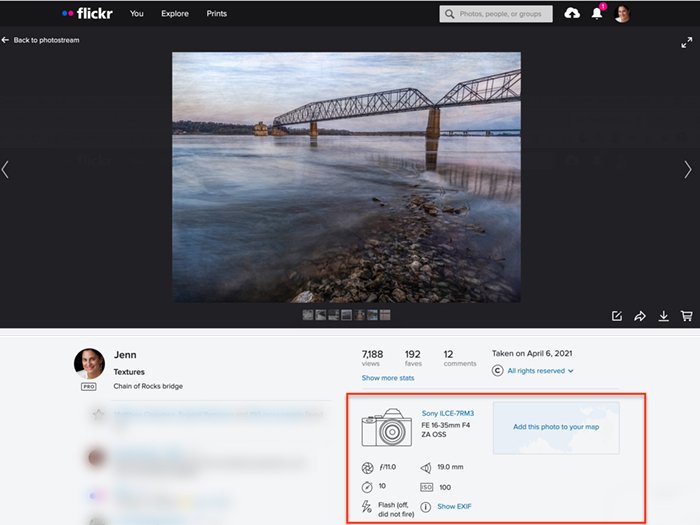
Many programs like Flickr have an EXIF viewer. In Flickr, the EXIF data is below the image. Click on ‘Show EXIF’, and you will see more information about a photo than you probably want to know.
IPTC
IPTC stands for ‘International Press Telecommunications Council’. This is a standardised metadata format created for the use of media and press agencies. Included is the type of information they needed to publish a photo. IPTC data includes image details like the title, description, and location. It also includes information about the photographer and copyright. Keywords, essential for stock photography, are also part of the data. The extended version of IPTC includes information about models or properties that may need a release before publication.
You can add IPTC information to your image file in Lightroom or programs like Photo Mechanic.
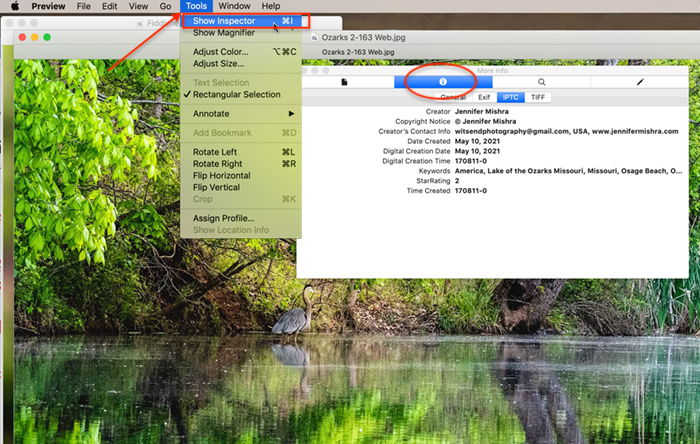
Look at the file’s properties to see the IPTC and EXIF data for images downloaded to your computer. In Windows, right-click on the photo and select Properties. Open the Details tab. In IOS, open the image in Preview. Go to the Tools drop-down menu. Select Tools > Show Inspector. Click the information icon.
XMP
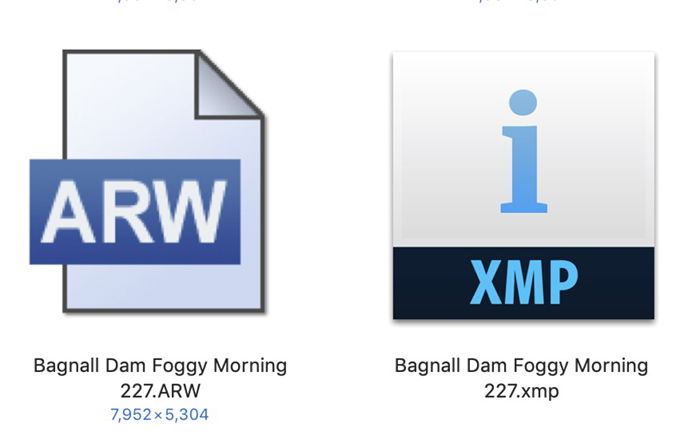
XMP stands for ‘Extensible Metadata Platform’. XMP files store changes made to your image in post-processing. You may know that Lightroom is a non-destructive editing program. Any changes you make are saved to a separate XMP file. Lightroom applies the changes to the image each time you open it. This is sometimes called a ‘sidecar’ file because it is connected to your original image file.
You will not see this extra file unless you specifically ask Lightroom to show it to you. Go to the Metadata drop-down menu. Select Metadata > Save Metadata to File (Ctrl or ⌘S). A new file appears next to your raw image. You can open the sidecar file as a text document to see all the included data. When you export the raw file as a JPEG, DNG, or other file formats, the changes in the XMP file are embedded in the image. But if you send someone your raw file without the XMP file, they will only see your original image.
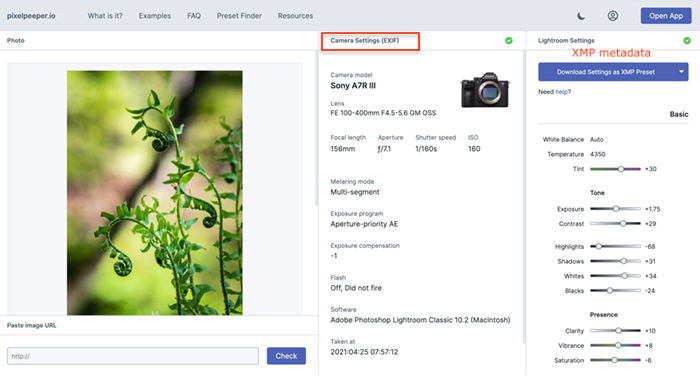
An easier way to see the XMP data is by using an image metadata viewer like Pixel Peeper. Pixel Peeper is a website that lets you see the metadata of JPEG files. This includes the XMP data. If you look at one of my images in Pixel Peeper, you can see the EXIF data, including the camera model and lens I used. Plus, you can see my camera settings. But what makes Pixel Peeper useful is that you can also see changes I made to the image in Lightroom. The program is reading the XMP data.
You can learn a lot about how to post-process by looking at more advanced photographers. Pixel Peeper lets you download these settings as a Lightroom preset to use on your own images. Other programs read the XMP from an image file, but Pixel Peeper is laid out a lot like Lightroom. This makes it easy to see the changes.
Adding and Removing Metadata From Image Files
There are a couple of ways to change or add metadata to your images.
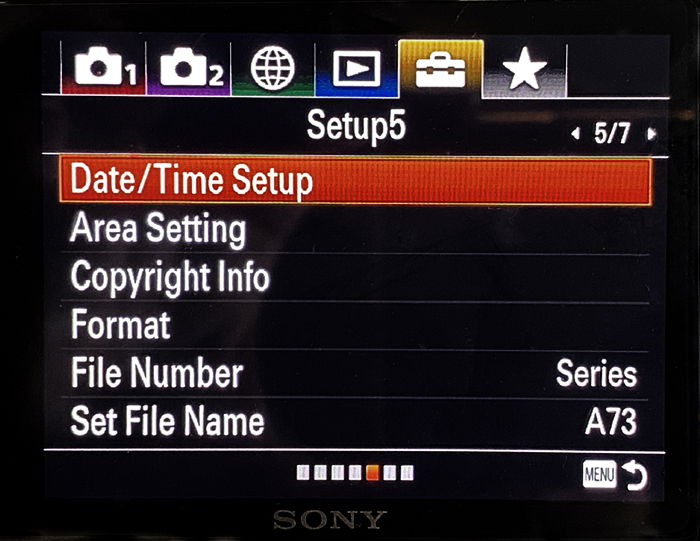
In your camera, check that you set the date and time correctly. This is especially important if you live somewhere with daylight savings time. Or if you travel to a different time zone. Your camera may also let you add copyright information and captions.
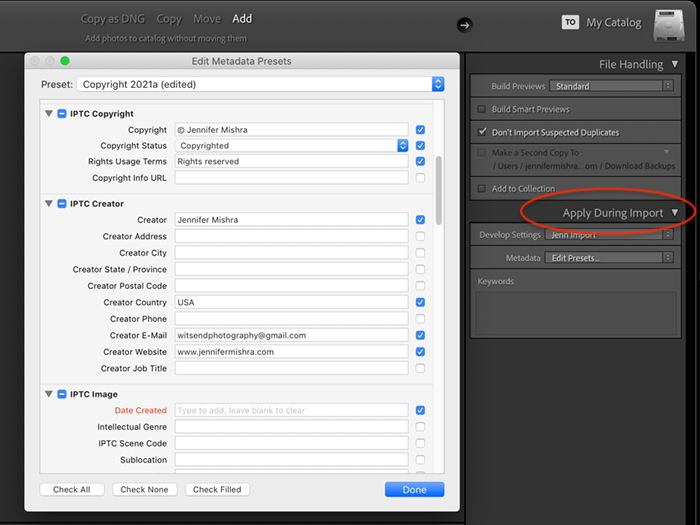
Most post-processing programs let you add at least some metadata. Usually, you can add captions and keywords. You can automate a lot of the metadata in Lightroom Classic. You can set up a metadata preset to include the copyright information and contact details. You can apply this preset to all imported photos.
If you are a Photoshop user, you can edit metadata by opening the File Info panel. Go to the File drop-down menu. Select File > File Info (shift-option-command I).
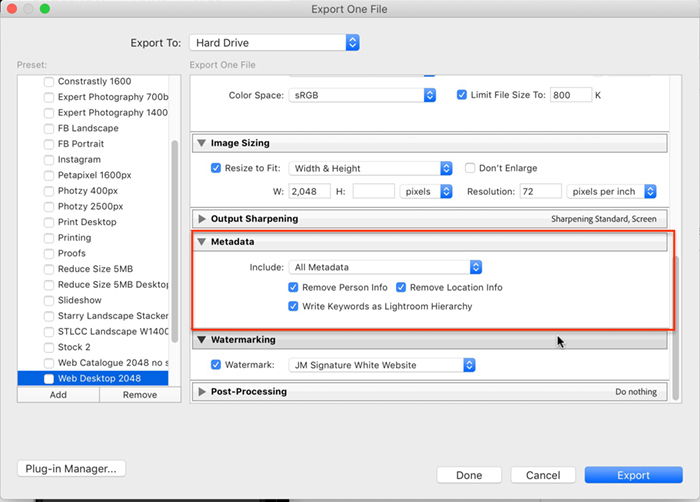
Some programs like Facebook and Instagram strip out metadata from your photos. But you also have control over what information is included with your photos. For instance, Lightroom Classic lets you choose what metadata is exported with your files. You can include all metadata or remove some of it. Specifically, you may not want to share your location or XMP information.
Various apps remove metadata from smartphone images before you share them. Both Android and IOS allow you to hide GPS information when sharing.
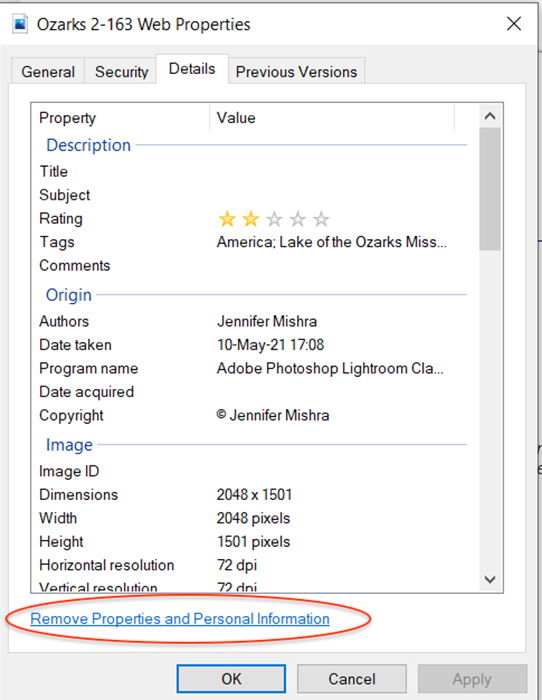
You can also remove metadata on your Windows computer. Right-click on the image and select Properties. Choose the Details tab. At the bottom, you will find the option to Remove Properties and Personal Information.
Conclusion
Metadata is information stored with your photos. It includes information about your camera, searchable text, and post-processing changes.
Programs like Lightroom let you see and edit metadata. You can look at the metadata of other photographers’ images using an image metadata viewer like Pixel Peeper. If you do not want to share this data, Lightroom makes it easy to exclude metadata when you export image files.
Try out our Effortless Editing course to master all the secrets of professional editing in Lightroom.

