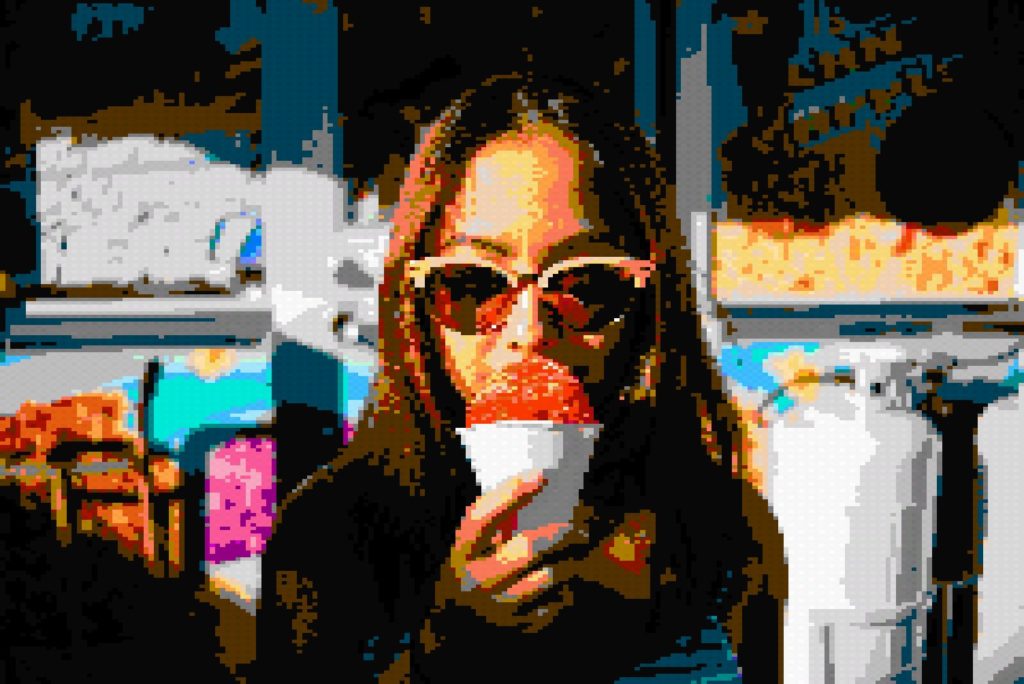
Bokeh is a photography term used to describe the aesthetic quality of the blur produced in the out-of-focus parts of an image. It can be used to create an ethereal and dreamy effect in your photos, or simply to make them more interesting. In this tutorial, you’ll learn how to add a bokeh effect in Photoshop.
How to Create a Bokeh Effect in Photoshop
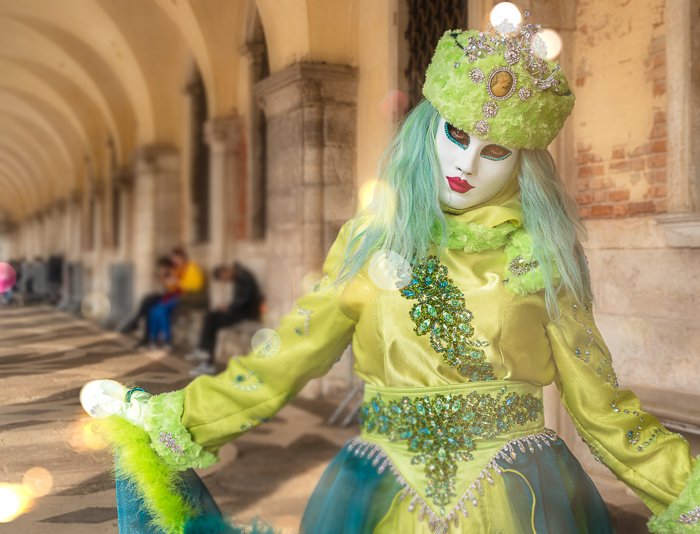
Let’s add bokeh to a photo. We will use a photo with a less-than-ideal backdrop. You can leave the bokeh lights in the background or bring them to the front as a soft bokeh overlay.
Step 1: Open File in Adobe Photoshop
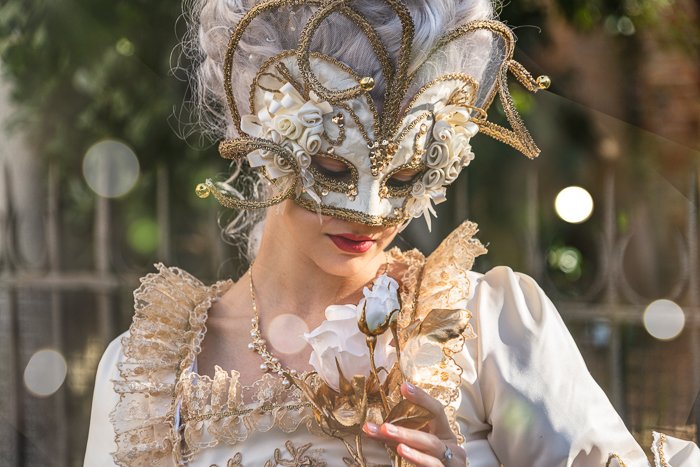
To create bokeh images in Photoshop, start by opening a file. Do not worry about the current background. But use a photo with a strong subject.
Click on the File drop-down menu and select File > Open. Navigate to the file you want to open.

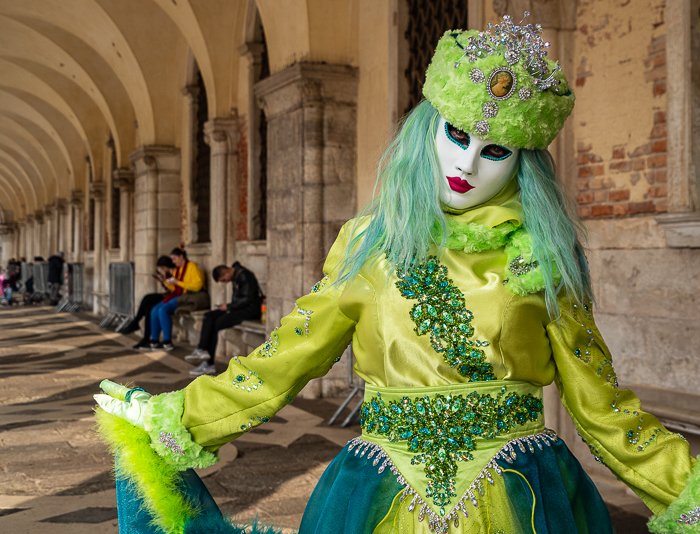
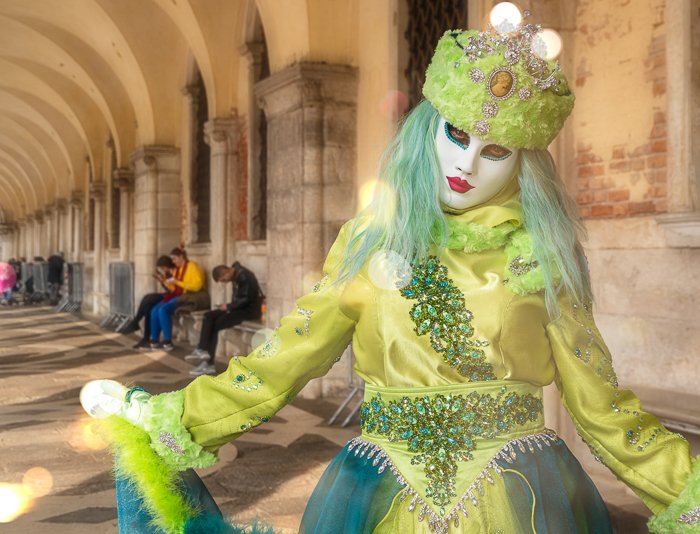
We are going to work with the image below. There is a slight blur to the background, but it is distracting and busy.
Step 2: Copy Background Layer
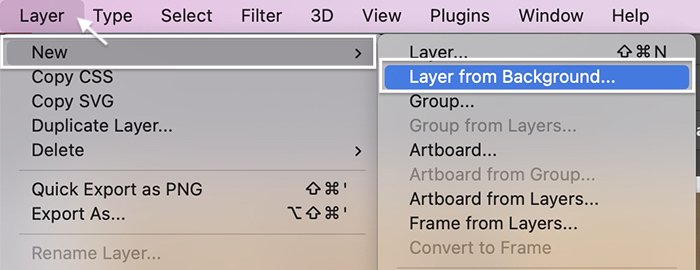
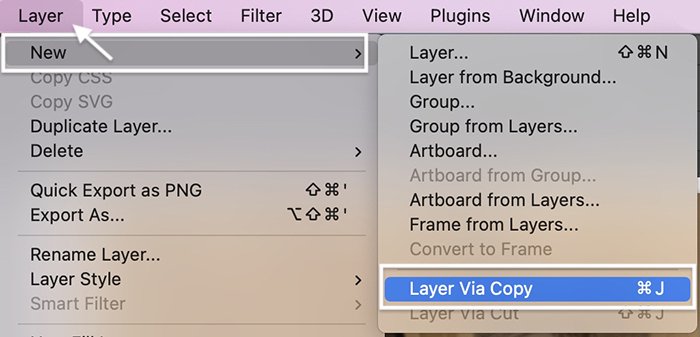
Start by copying the background. Go to the Layer drop-down menu and click Layer > New > Layer from Background (Ctrl/Command+J). Label this layer “Background Blur.”
Step 3: Move Subject to New Layer
We are going to treat our background and subject separately. So, let’s select and move the subject to its own layer.
First, click the Quick Selection tool in the toolbar. In the options bar above your photo, choose “Select Subject.” Zoom in and check the edges of the selection.
Use the Quick Selection tool to refine the edges. To remove selections, hold the Alt key or Option key. Use the bracket keys to make the tool larger or smaller.
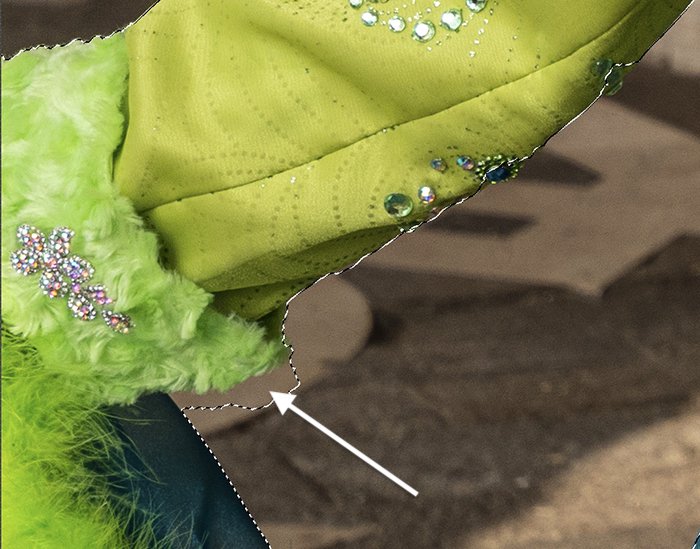
After you are happy with the selection, go to the Layer drop-down menu. Choose Layer > New > Layer via Copy (Ctrl/Command+J). Label this layer “Subject.”
Step 4: Remove Subject from Background Layer
We are going to blur the Background Blur layer in a minute. But first, let’s remove the subject and make the entire layer background.
With the Subject layer selected, click the Quick Select tool. In the options bar, choose “Select Subject.” This selection does not need to be perfect.
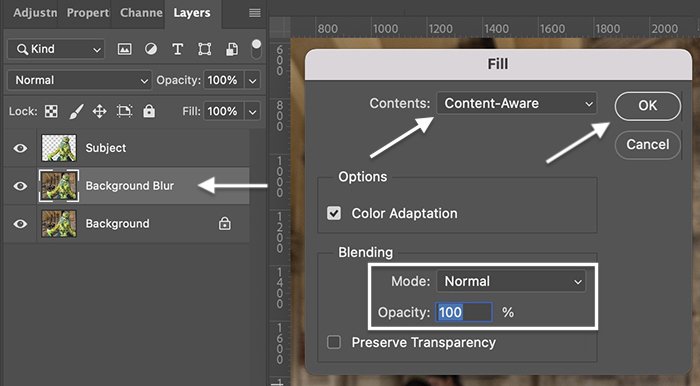
Go back to the layer labeled “Background Blur.” Marching ants should still show the selected subject. Go to the Edit drop-down menu and choose Edit > Fill. The Contents drop-down menu displays “Content-Aware,” the mode is normal, and opacity is 100%. Click OK.
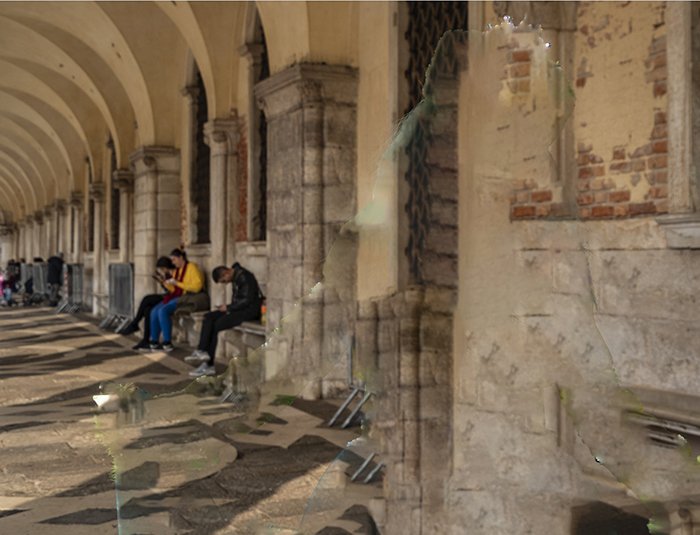
Hide the Subject layer by clicking the eye icon next to the layer. The background fills in where the subject used to be. Do not worry if the pattern looks rough or if parts of the subject are still visible.
Step 6: Convert Layer to Smart Object
Convert the Background Blur to a smart object. With a Smart Object, we can edit the layer and then come back and re-edit the layer later.
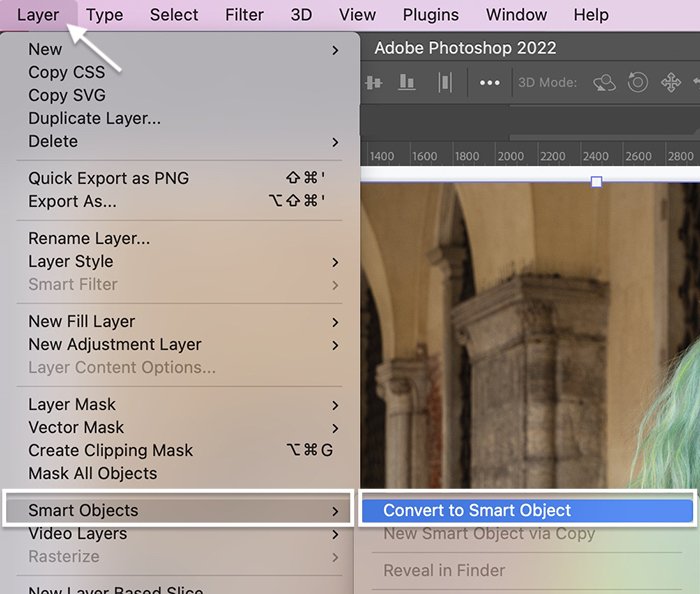
Go to the Layer drop-down menu. Click Layer > Smart Objects > Convert to Smart Object. An icon appears in the lower right corner of the layer to show it is a smart object.
Step 7: Create Bokeh Background Blur
With the Background Blur layer selected, go to the Filter drop-down menu. Select Filter > Blur Gallery > Field Blur.
The Field Blur filter lets you blur parts of the image, but it has another useful feature. It has a bokeh slider!

Bokeh Overlay Steps
- Start by blurring the background. Move the Blur slider to the right somewhere between 100 and 200 pixels.
- Open the Effects tab.
- Move the Light Bokeh slider to the right until soft balls of light appear. Depending on your image, you may create a lot of bokeh or only a few balls of light.
- Play with the Bokeh Color slider.
- Also, experiment with the Light Range slider. Moving the tabs to the left may reveal bright bokeh and hide dark pixels. You might be surprised by the results!
- Click OK.
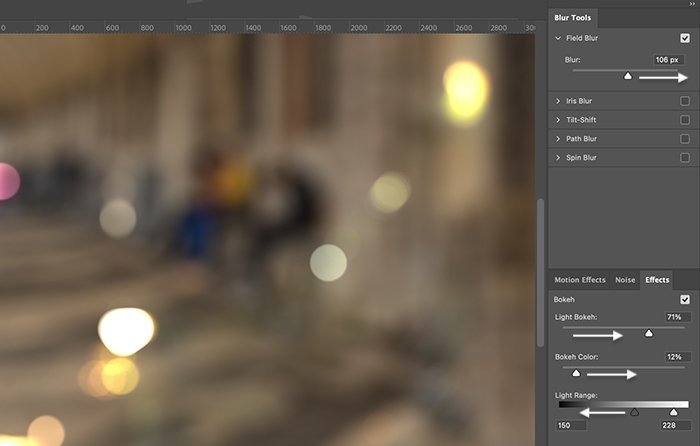
The amount of bokeh you can create from a boring background might surprise you. But if you do not create a blur effect that you like, use another photo to create the bokeh background.
Step 8: Darken Background With a Curves Adjustment Layer
Darkening the Background Blur layer will help when you later blend the bokeh into the photo.
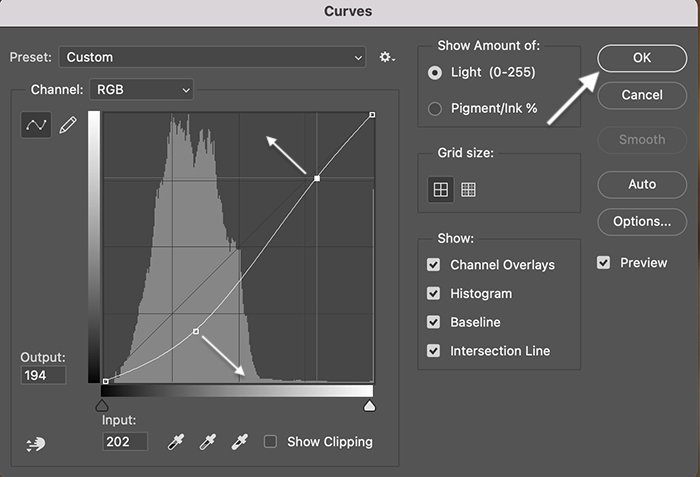
Add a Curve adjustment to darken the layer. Go to the Image drop-down menu. Select Image > Adjustments > Curves (Ctrl /Command+M).
Choose a point on the line about a third of the way up and drag it down. You can also lighten the bokeh by choosing a point at the top of the line and drag up.
Click OK.
Step 9: Turn on Screen Blending Mode
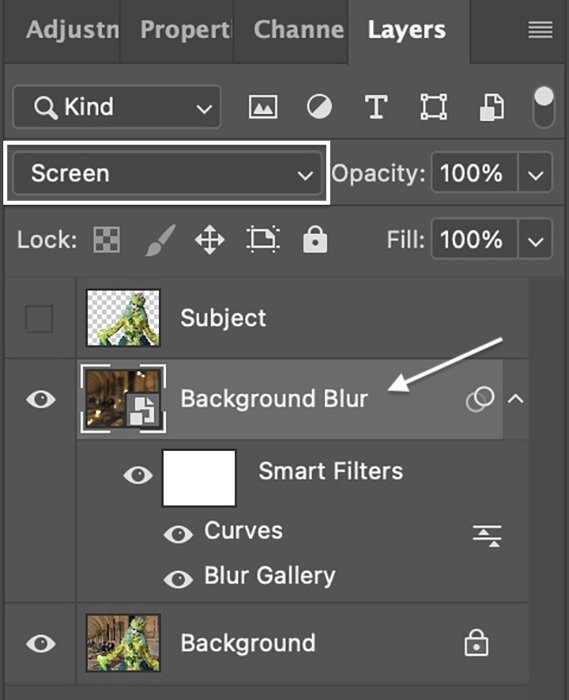
Above the Layers panel, change the blending mode to “Screen.” The blending modes drop-down menu is in the Layers panel.
Step 10: Enhance the Light Bokeh
Depending on your image, you may want to enlarge or reposition the background bokeh using the Transform tool (T). You can copy the blur layer and add bokeh.
Reduce the bokeh effect in Photoshop by lowering the opacity of the layer. You can also add a layer mask to remove or reduce the light that does not work with the image.
Plus, you can decide if you want to move the subject in front of the bokeh. If you do, simply turn on the Subject layer. The bokeh will only appear in the background.
Step 11 (Optional): Blur Background
You may want to return to your original background image and blur the background a little. Use the same Field Blur filter for this.
Create a new copy of your Background layer. Remember to convert it to a Smart Object. Open Field Blur in the Blur Gallery.
Start by putting a pin on your subject. Just click on your photo. Move the Blur slider to zero.
Then, put a pin in the background and add blur. You can place as many pins as you want around the image and adjust the blur for each pin individually.
Conclusion
That’s it! Creating bokeh in Photoshop is easy. Simply pull bokeh blur out of the background of your image using Field Blur. Once you make the bokeh overlay, you can use it on other photos.
Try out The Magical Photography Spellbook e-book to add other vibrant effects to your photos!
