What is the difference between macro and micro in close-up photography? Is there one? Or are they all the same? The answer is that they’re similar, but they also have their differences.
In our article, you’ll learn the differences between these three types of photography. And we’ll also show you what equipment is best for each.
What Is Close-Up Photography vs Macro vs Micro?
The term “close-up photography” has no exact definition. It generally means any photo that shows the subject closer and in more detail than how we’re used to seeing it.
So when should you use a close-up composition? You can apply it to crop a headshot, a flower stamen, or even the Moon. It’s not so much about how close you are to the subject as it is about the field of view.
Any lens can take regular close-ups. You just have to zoom in or physically get closer to your subject. For instance, you can zoom in to get close-ups of the Moon. Or simply shoot at a short distance when shooting small objects.
However, most lenses eventually reach their minimum focusing distance, which means your subject will be blurry if you get too close.
Close-Up vs Macro Photography
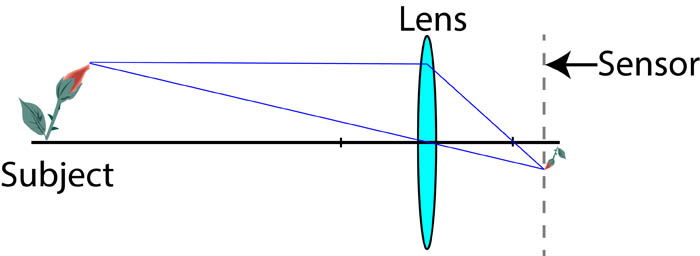
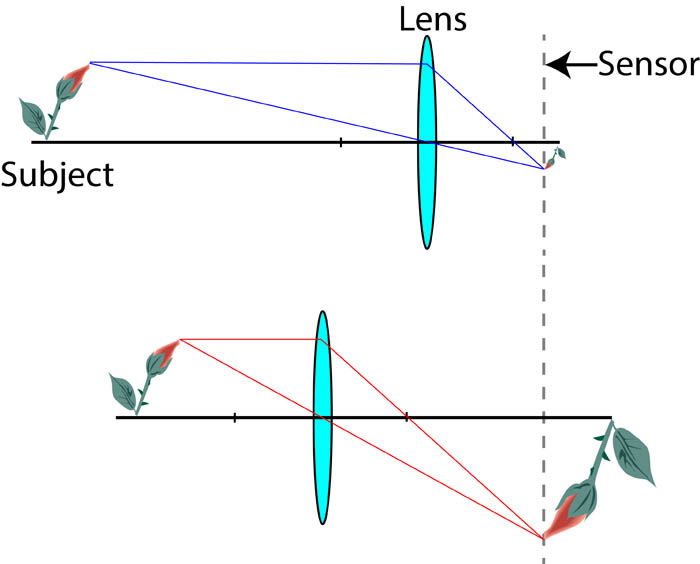
In regular photography, the image created on the sensor is much smaller than the subject itself. For example, the image of a 10-meter tree might only produce an image 1 cm tall on the sensor. That’s a ratio of 1:1000.
As we get closer to small objects, the image size on the sensor gets much closer to the real-life size of the subject. Eventually, we can get close enough and still keep the subject in focus.
This means we can produce an image the same size as the subject. At that point, the ratio will be 1:1. You can call it life-size or just 1x magnification. It is the point at which we pass from general close-up images to true macro photography.
“True macro” applies to situations where the image size is equal to or greater than the subject. But it’s not uncommon to see a lens with a macro label that’s actually just a close-up setting.
For a lens to be true macro, it must produce a sensor image size at least as big as the subject. It is often bigger, up to a factor of ten to one (10x or 10:1). That’s about the highest magnification you can achieve without a microscope.
Now, let’s examine a few options available to achieve macro from 1x to 10x.
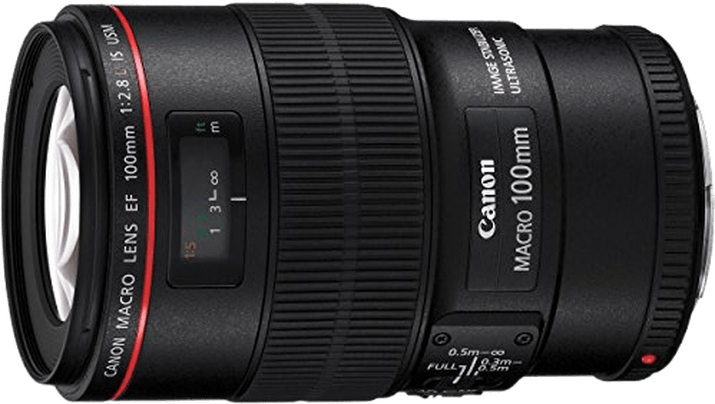
We recommend the Canon EF 100mm F/2.8L Macro IS USM lens. For more options, you can read about the best macro lenses on the market today.
What Equipment Do You Need for Macro Photography?
Let’s take a look at all the equipment you need for shooting macro.
Reversing Rings
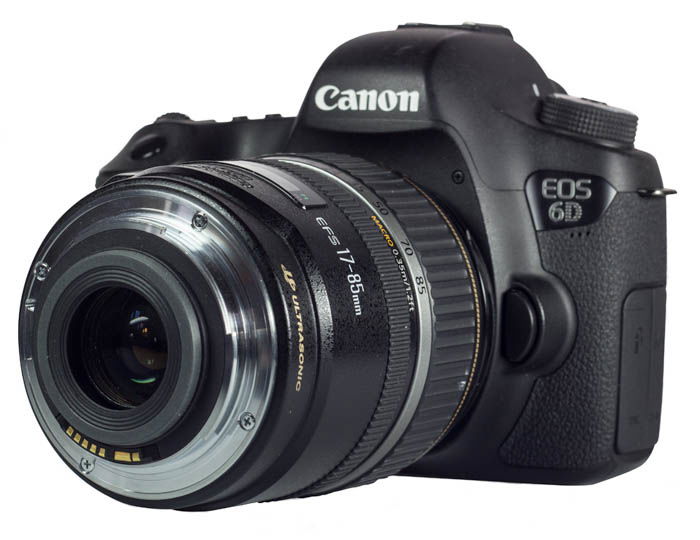
The cheapest option for macro photographers is to use a simple adapter ring. It fits onto the front of the lens, so you can install a lens backward onto your digital camera.
The disadvantage is that you lose automatic control of the lens. Since the lens is backward, it’s no longer electrically connected to the camera.
Once you remove the lens from the camera body, the aperture stays wide open. However, on some lenses, you can lock the desired aperture. To do this, simply press the depth-of-field preview button while disconnecting the lens.
But doing this upsets the automatic metering. So you must set the camera to Manual mode and adjust the shutter speed and ISO for the desired sharpness and exposure.
You can also use a crop sensor lens with a reversing ring on a full-frame camera. Doing so allows you to achieve a 4x magnification for close-ups. We recommend the Fotodiox macro reverse ring.
If you prefer to keep your lenses attached to your camera, you can use close-up lens filters on the thread of your standard lens. These generally come in a set of different magnifying powers (diopters).
If you need to get a little closer to your subject, just screw a +1 diopter close-up lens onto your standard camera lens. If that doesn’t get you close enough, swap it for higher magnification or combine the filters.
Close-up screw-in lenses get you into the true macro range. But this is with reduced optical quality. We recommend looking at Amazon’s best sellers for camera lens diopters.
Extension Tubes
If you get closer to a subject than the minimum focusing distance, the light will try to come into focus behind the sensor. This makes your image look blurry.
Extension tubes move the camera lenses farther away from the sensor. In other words, the focal plane again lies on the camera sensor to produce a sharp image.
Using an extension tube produces a larger image, but it’s not as bright. It can be equivalent to a decrease of two or more stops at higher magnifications. But since they have no optics, there is no loss of quality.
You can stack extension tubes to achieve closer focusing distances. They generally get you just into the true macro range.
We recommend the Viltrox metal extension tube set.
Macro Lenses
If you want to shoot macro photography without the hassle of using attachments, then consider buying a macro lens.
A dedicated macro lens lets you focus close enough to achieve a 1:1 image size without additional attachments. This lens can also focus on infinity, so you can use it as a standard prime lens.
You can combine macro lenses with attachments if you want higher magnifications for macro photography. The Canon MPE-65mm f/2.8 macro lens has no focus ring. It just has a magnification setting.
To focus, you either have to move the subject or the camera. That’s why it can be challenging to shoot accurately at high magnifications. A sturdy tripod and a focusing rack are essential.
We recommend the Canon EF 100mm f/2.8L IS USM and the Canon MP-E 65mm f/2.8 1-5X macro lens.
Macro Photography vs Micro Photography
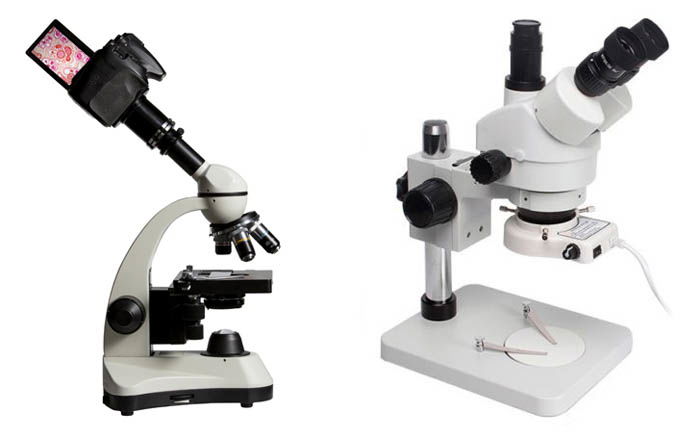
Microphotography applies to magnifications exceeding those you can get using macro photography equipment. There is no “micro” lens you can attach to your camera.
To reach magnifications much greater than 5x, you need a microscope. Depending on the optics, you can achieve magnifications from 7x to 100x or more.
You can buy a microscope for less than the cost of a macro lens. Perhaps the most versatile for photography is an inspection microscope. This type has a ring light to illuminate the subject from above.
Some now have a built-in USB camera. But their resolution is far lower than even a budget camera. Look for an instrument that has a C-mount port. That way, you can use your camera with an appropriate adaptor.
We recommend the Celestron 44341 LCD digital microscope II.
Conclusion: Close-Up Photography vs Macro vs Micro
Remember that close-up photography is a blanket term. It’s for regular close-ups, macro, and micro photography. Close-up means you’re just shooting at a short distance from the subject. You can use almost any lens to achieve close-up photos.
Macro means you’re taking super close-ups of objects at 1:1. So the image size on your sensor is equal to the size of the subject in real life. To learn more about macro photography, check out our Macro Magic course!
Micro means the magnification is at a microscopic level. In other words, it deals with subjects you can’t see with the naked eye.


