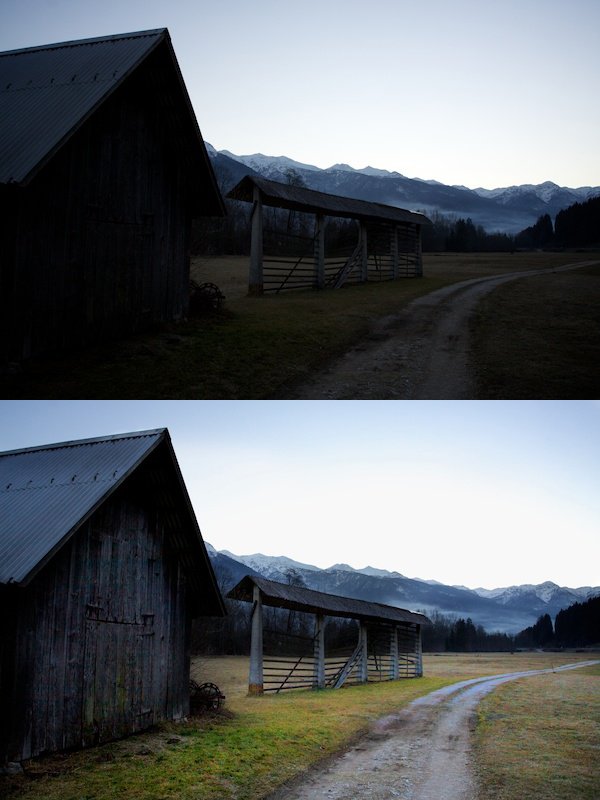
If you’re like me and don’t particularly like the look of HDR photos but still want to find a balance in exposure when shooting two contrasting brightnesses, you will definitely find the burn and dodge tools very useful.
They’re used as brushes in post-production software so you can add them where they’re needed.
Using Burn And Dodge Tools
Think of “burn” and “dodge” as “darken” and “lighten”, respectively, if that helps you at all; that’s exactly what they do.
The burn brush makes the areas you’re brushing over darker and the dodge brush will lighten them, it’s as simple as that!
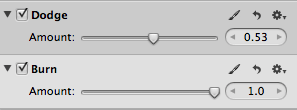
When you get the tool out, it will look something like the image below. What you can’t see is that you can change the strength in two different ways using Aperture: on the slider controls and with the additional slider in the adjustment section, which you can see in the second image.
How do you use the Burn & Dodge tools?
I typically use these tools when I’m combining two contrasting brightnesses in a single photo.
If you were shooting an HDR photo, you would take three different photos with different exposures and let photoshop do all of the hard work but I prefer the results from the burn and dodge technique.
Have a look at the photo below that I’m going to be working on. As you can see, it’s not all that special; the contrast kind of ruins the photo.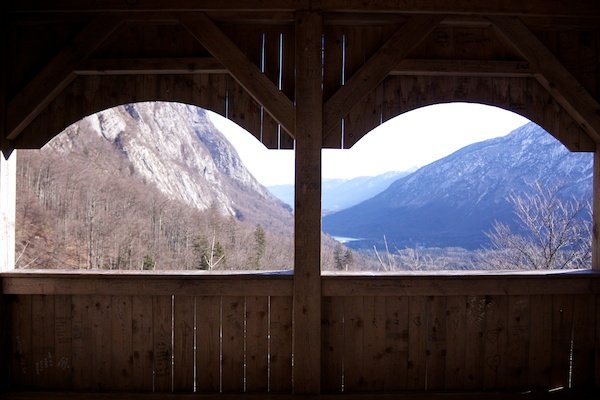
The first thing I’m going to use is the dodge (lighten) tool because it’s the order that Aperture recommends you do it in. Truthfully though, it won’t make a huge amount of difference.
I take a large sized, soft brush and go around the areas that I want to lighten. The images below demonstrate the difference between a soft and a hard brush.
The dashed circle will contain the majority of the brush work and the effect will fade out until it reaches the solid circle. You can adjust the softness but I like to keep it quite soft to start with so that I can keep the edges a little bit dark, maintaining a slight vignette effect.
NOTE – I made the brush a lot larger when I painted it on, it’s just smaller here to show you. The brush size I used was 430.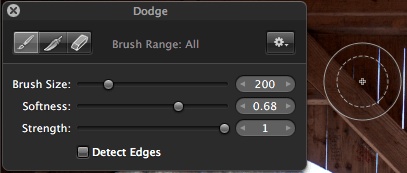
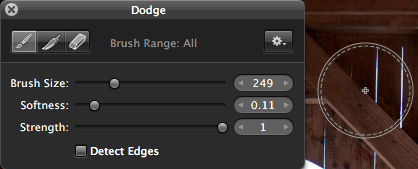
When I’ve finished with the majority of the area I’m altering, I like to make the brush small and hard and go over the smaller details, such as the post in the middle of the photo.
You don’t want to overlap this so it’s important to be very careful with it.
Depending on how you like working, you can be quite liberal with your brush strokes, then use the eraser tool to remove the parts that you shouldn’t have covered.
In some situations, this makes more sense; I used it below with the burn tool because it was easier to spot where this overlapped the wood.
You’ll notice that you can also use the feather tool. When you’re using the dodge tool, this allows you to smooth the edges of your current brush strokes.
It doesn’t serve much of a purpose in the photo that I’m working on, so I left it out but it can be worth experimenting with when the contrast isn’t quite so obvious. When I’m done with the dodge tool, my photo looks like this.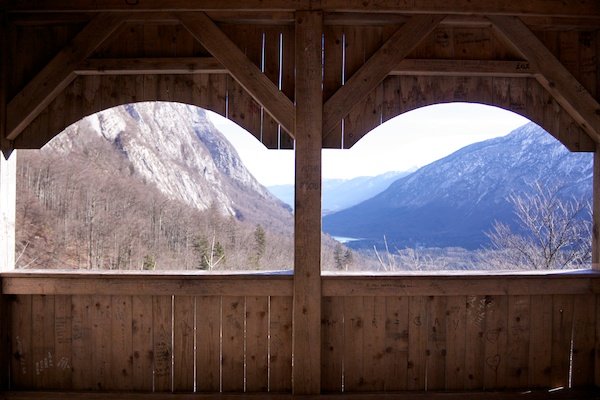
Next on to the burn tool.
Now, most of what I’ve already covered will apply here, only I made my brush very hard because the areas that I wanted to darken were much more specific. You need to be realistic about the effects that you’re trying to achieve when working with just one photo, unlike with HDR.
This technique looks a lot more realistic but there are certain things that it can’t do…
The purpose of the tools in this photo are to improve the dynamic range so that it appears much more similar to what we see with our eyes, rather than what a camera can record.
SIDE NOTE – in my experience, 35mm film has a much better dynamic range than my SLR’s sensor; you may want to experiment with that too.
If you look at my histogram below, you’ll see that there is some information in the far right. This means that the photo has overexposed areas, namely the sky.
When an absolute white is recorded into the camera’s sensor, no amount of burning can possibly bring back the detail that would have been there but it will still help out a lot with the rest of the photo.
It may appear as though the mountains on the left have some white in them but, in reality, they’re just very bright. I turned up my burn effect quite a lot in this photo.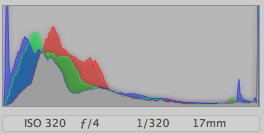
When I’m done with the burn effect, everything looks much more even and this is my final result in a the comparison below.
Before I finish, it’s worth mentioning that, if you have access to Photoshop, you can select a certain range to work on when in the brush mode, such as highlights, midtones and shadows. This will have a slightly better effect if you can master it.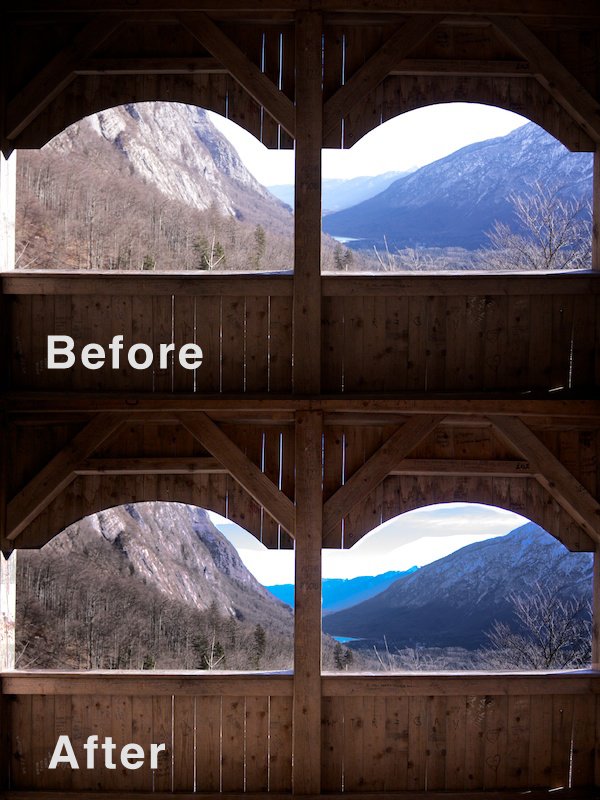
Another good way to make this effect work is to expose for either the highlights or the shadows of a photo, then just use either the burn or the dodge tool to finish the effect.
This is less complicated but I’m not convinced that it makes it that much easier, and you may find you struggle with the darker tones.